Westend61 / Getty Images
Switching up your hair color is one of the most drastic and fun ways to refresh your look. Whether you add subtle highlights to brighten up your hair or go for a 180 switch from brunette to platinum, it's an undeniable treat. However great, though, professionally coloring your hair can be pretty expensive, which is why mastering the art of using at-home hair dye is such a coveted skill.
While it may seem easy to slap on some dye and wait for it to do its magic, coloring your own hair requires more attention. For starters, you need to assess the condition of your hair, decide which shade is best for you, and find the right formula—and that's before you even start the coloring process.
Thankfully, we know a few professional hairstylists and colorists who shared their expert insights with us. By following the below tips and tricks, you'll be able to DIY your hair color and be happy with the results. From what to do beforehand to prep your hair for dye to when to call a friend for a second pair of eyes to make sure you distributed product properly, keep reading.
Meet the Expert
- Ramsay McLean is a celebrity hairstylist at the Kim Vo Salon in West Hollywood.
- Millie Morales is a Miami-based celebrity haristylist and Garnier brand ambassador.
- Owen Gould is a celebrity hairstylist in Los Angeles and his clients include Sienna Miller, Rachel Brosnahan, and Karlie Kloss.
Don't Wash Your Hair Beforehand
The natural oils on your scalp actually serve as a protective barrier to guard against irritation from the chemicals in the hair dye, so you want them there before you apply dye. "Do not wash your hair before applying color," notes Morales. "This will irritate your scalp and can become painful. The hair should be clean of product but not of your natural oils, as it acts as a protectant."
Remove Buildup
If your hair is particularly dirty, however, make sure that you wash your hair at least 24 hours before reaching for the box—doing so will help the dye penetrate without being too clean and vulnerable to the effects of the dye. Gould recommends using a clarifying shampoo as it "will create a clean canvas for the dye to adhere to and result in more even color distribution." We like Ouai's Detox Shampoo as it harnesses the power of apple cider vinegar to wash away excess oil without drying it out and keratin to strengthen strands.
Detangle Your Hair
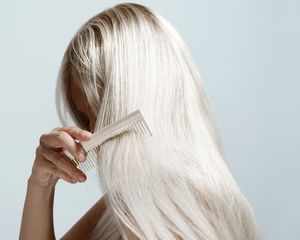
Prior to reaching for your hair dye, Morales recommends thoroughly detangling your hair. This will prevent any knots or tangles from creating an uneven application—plus, we doubt you want to worry about any detangling mid-application. Use a wide-tooth comb and gently work your way from your ends to your roots.
Pick the Best Formula For You
Long gone are the days when liquid hair dye formulas were the only option for at-home hair color. Now, mousse formulas are just as popular. What’s the difference between a liquid dye and a mousse formula, you ask? McLean says mousse colors are more translucent, leading to a shimmery, iridescent effect after being applied. Liquid colors are typically more opaque or condensed and may lead to a more pigmented final look.
Keep Your Hair Color Simple
When it comes to at-home color, McLean recommends keeping things simple, “At-home color can be great for touching up your professional color in between appointments,” he says. Try not to go more than one or two shades lighter or darker than your natural color—anything more, and you run the risk of splotchy, uneven color that can turn brassy, plus an expensive salon bill to correct the mistakes.
As for highlights? “Any form of highlighting, balayage, or ombré becomes too challenging for at-home coloring procedures,” he says. “Those should be left to the professionals.”
Be Patient With Drastic Color Changes
Now, if you really want to do a drastic color change, say from black to platinum, you're going to need to be patient. Most experts, including Gould, suggest seeing a professional colorist for this type of change. If you're set on doing it at home though, here's how he recommends you go about it.
First, you need to choose a high-quality hair lightening product specifically designed for dark hair, such as Garnier's Nutrisse Ultra Color Blondes Lightening Cream which is formulated to lift seven levels of pigment. Make sure to follow all the tips we've provided so far (wash your hair 24 hours in advance, detangle, etc.) beforehand, and then once you start applying the dye make sure to follow the directions. "Pay attention to recommended processing times—it’s easy to leave bleach on too long and the results are never pretty," warns Gould. Then, if you haven't reached your desired shade, he says to space out your next dyeing session to avoid damage. In the meantime, you can use a color-depositing shampoo and toner to minimize brass and neutralize your temporary shade.
Choose the Right Shade
When it comes to choosing a flattering at-home color, McLean says to keep your skin tone in mind. “If you have paler skin, go for color with warmer tones,” he suggests. “If you have olive to darker skin tones, ashy or cooler tones will complement you.”
Byrdie Tip
McLean says most manufacturers will include keywords such as "ashy" and "warm" in their marketing, so make sure to read the box carefully.
Do a Strand Test
Before applying dye all over, Gould strains the importance of doing a strand test first to make sure your hair reacts well to the formula. (You wouldn't want to damage your hair to the point of breakage, now would you?) Plus, he says doing this will help you see how the hair color will actually turn out and how long it needs to process.
Follow the Directions On the Box
This tip may seem obvious, but it's one worth mentioning. "Read and follow the instructions carefully," says Morales. At-home hair coloring kits have been formulated to work in a specific way, so it's important to use the instructions that come with your kit for any application recommendations like timing and post-color conditioners.
Use the Right Application Tools
When it comes to glistening, all-over color, it’s all about how you apply the dye. Instead of combing through with your fingers, which can lead to splotchy, uneven color, McLean says to use an application brush like the ones a professional colorist would use. Here’s a little secret: you can score them for less than a dollar at most beauty stores! He also recommends using disposable latex gloves. Most times, these tools come with the at-home dye box.
Don't Mix Your Dye in Advance
Just because you have two boxes of hair dye doesn't mean you should use them both at once. "Only prepare and mix what you are going to use," Morales says. You don't want your hair dye to go to waste if you don't end up needing it. Don't worry—the few minutes it takes to mix up that second box won't lead to an uneven color.
Section Your Hair
When it comes to actually coloring your hair, it's a good idea to work in sections rather than trying to dye your entire head at once. "For a better coverage, make sure you section you hair properly," Morales says. The amount of sections you'll need is dependent on how much hair you're working with, but in general, create a minimum of four sections—two on the bottom half of your hair and two on the top. McLean also recommends stocking up on clips, like Fagaci Hair Clips to section off your hair.
Protect Your Hairline
We'd be willing to bet that one of the last things you want is a stained hairline post-hair dye. Luckily, this is avoidable. McLean suggests applying a barrier cream at the hairline to prevent staining. Try using Vaseline's 100% Pure Petroleum Jelly, which will keep any hair dye from adhering to your skin mid-application. When you're done, you can wipe away any dye—and petroleum jelly—from your skin using a cotton pad and some lukewarm water.
Phone a Friend
Coloring your hair at-home can be challenging, especially if you're doing it all on your own. To make sure you get even coverage, McLean recommends having a friend to lend a hand (who you’ll need when you’re craning to make sure you didn’t miss a spot) to help with your at-home hair coloring journey. If they're not able to be there in person, a video chat will do.
Purchase Extra Hair Dye
It's easy to think that you'll only need one box of hair dye when coloring your hair at home—after all, it is an at-home hair coloring kit. But if you have a lot of hair, Morales advises otherwise. "Buy more than one box of color—you don't want to be short on product in the middle of the process."
Byrdie Tip
Even if you think you won't need a second box for your hair coloring session, having extra hair dye on-hand is great for when it comes time to touch up your roots.
Switch to Color-Safe Hair Care Products
After you've mastered the above dyeing hair tips, you may be curious about post-color care. To keep your new hue looking its best and prevent premature fading, it's a good idea to swap your go-to shampoo and conditioner for a duo that's specifically formulated for color-treated hair, such as Love Beauty and Planet's Sulfate-Free Murumuru Butter & Rose Shampoo and Conditioner. We also recommend using Innersense's Hydrating Hair Mask at least once a week to give your ends some extra love.
Stay Clear of the Sun We
We're not saying you can't spend time in the sun, but prolonged exposure to sunlight can fade the color in your hair. "If you plan to spend time in the sun, consider wearing a hat or using hair products with UV protection," suggests Gould.


