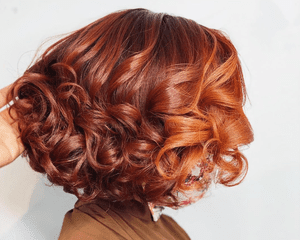
@kellonderyck / instagram
Wigs have long been a way to try new styles without damaging your natural hair. However, technology has taken the wig industry to the next level, and today's options are virtually undetectable. Installing these new options, though, requires acquiring at least a basic knowledge of application and styling techniques. To help get you up to speed, we tapped four celebrity hairstylists for tips on properly installing a wig so it won't lift or slide at all.
Meet the Expert
- Tippi Shorter is an experienced hair expert who serves as Mizani's global artistic director. She has worked with Alicia Keys, Rihanna, Lady Gaga, and more.
- Lawrence Davis is an Emmy award-winning hair stylist who has created looks for Tyra Banks, Jennifer Hudson, Gabourey Sidibe, and others.
- Moira Frazier is the Emmy-nominated head of the hair department for Abbott Elementary.
- Camille DeFreitas is a hairstylist and wig expert at UNice.
How to Choose a Wig
Figure Out the Type of Wig You Want
It's tempting to splurge on premium units immediately, but Shorter advises against it for beginners. "You should learn installation techniques on a moderately priced one first," she says.
Frazier recommends that newcomers try a u-part wig or a v-part wig. These partial options allow the wearer to leave small portions of their natural hair out and ease into full wigs. "U-parts are perfect because [individuals] can learn how much hair to leave out and how to braid their hair down," she explains. "They're just a great way to practice in preparation for a full lace or lace front wig they want to indulge in."
Take Your Measurements
Taking head measurements is key to ensuring your wig fits properly. "The first thing you've got to do is make sure you're getting the right size," Frazier says. You want to make sure that you measure your head's circumference."
According to our experts, the circumference is the total arc of the boundary around your skull. It's important to ensure that you are going all the way around your head when measuring to get an accurate picture of your measurements. "Typically, the circumference can go anywhere between 19 inches to 23 inches. This number can help you determine whether [your wig size] is small, medium, or large," Frazier adds.
You can use measuring tape or Davis' foolproof method. He prefers to wrap saran around his client's head and measure the length. Once you have your measurements, you can select the brand that best accommodates your needs. "A lot of times, you can use the measurement chart of the wig manufacturer," Frazier explains.
Decide Where to Buy Your Wig
When it comes to buying a wig, you have plenty of options. You can select a pre-made wig from brands like UNice, Waeve, Mayvenn, or RPG Show. If you want to splurge, you can utilize a custom wig service (Parfait is a great option). "You can have something custom-made for you," Shorter says. That way, the color matches, the texture matches, and the density matches, and you're not trying to make something work that may not work."
How to Prep Your Hair for a Wig
To kick off the installation process, you'll want to flatten your natural hair as much as possible to reduce bulkiness underneath the wig. Achieving a flat look can be done in many ways. "My approach to hair prep is to always wrap [the hair] down as flat as possible," Davis says. "You can do pin curls, braids, or just wrap [your hair] around your head."
Braiding the hair underneath the wig is one of the most common methods. You can choose straight-back cornrows, a beehive pattern, or other options. Shorter recommends taking your hair type into consideration before choosing your desired braid pattern. "The thicker your hair is, the more braids you'll need," she said. "You can do more than one [braid] pattern at a time [if you need flexibility for a look]."
Davis favors the beehive for thick hair. "Everybody has their way of wrapping, but for me, the flattest way of wrapping is to braid it down," he said. "With very thick hair, I recommend a circle [pattern]. Start from the perimeter [of your head] and go completely up to the top. Then, you'll sew the little edge [of your wig] down within the parts you've formed from the cornrows."
How to Install a Wig
Bleach the Knots
If you use a lace front wig, it's essential to know that some come with unbleached knots. If that's the case, the first thing you'll want to do is bleach them. "Bleaching the knots involves applying a bleaching solution to the lace material of the wig, primarily at the hairline, to lighten the knots where the hair strands are tied," DeFreitas says. "This process helps to make the knots less visible and creates a more natural-looking hairline when the wig is worn."
Tint the Lace
To make a lace-front wig look undetectable, you'll want to ensure it matches your skin tone. To achieve this, you can apply tinted lace sprays or powders. "Tinting the lace is a common practice to match the wearer's skin tone for a more seamless and natural appearance at the hairline," DeFreitas adds.
Pluck the Wig
The next step? Plucking your lace-front wig with tweezers. "This involves carefully removing excess hair from the hairline and parting areas to create a more natural look with less density," DeFreitas explains. This process mimics the appearance of natural hair growth and reduces the density of the wig, making it look more realistic and scalp-like."
Apply a Wig Cap
Whether you choose a lace-front wig or a glueless option, you need to decide if you want to wear a wig cap. "Wig caps can provide a smoother base for the wig and help to protect the natural hair underneath," DeFreitas says. "However, they are not always necessary depending on the installation method and personal preference."
Cleanse Your Hairline
Before installing any wig, you'll want to cleanse your hairline area, but it's especially vital with lace-front options. "Cleansing your skin before applying glue is essential to remove any dirt, oil, or residue that could interfere with the adhesion of the wig," DeFreitas notes. "Clean skin provides a better surface for the glue to adhere to, ensuring a secure and long-lasting hold."
Install the Wig
Wigs can be clipped/pinned in, sewn in, or glued down (depending on the type you choose). Again, our experts say glueless wig options are best for beginners. "For first-time wig installers, I recommend learning how to apply hairpins to anchor their wig on," he says. Shorter agrees, noting that she loves to use carbon hair pins to secure glueless wigs. "They have a little rigid texture to them," she says. "I also love that there are no balls on the end of the pin, so you can put them through the lace without tearing it."
If you feel comfortable with lace-front wigs and using glue, DeFreitas recommends applying the adhesive sparingly along your hairline. "It's important to follow the manufacturer's instructions and use a glue specifically designed for wig application to avoid skin irritation or damage," she says. "Applying glue precisely and evenly helps to ensure a secure and natural-looking bond between the wig and the scalp."
Once you've adhered the wig, you'll want to cut off the excess lace (if wearing a lace-front wig) and ensure there are no harsh demarcation lines around the front of your head. You can apply a melting spray along your hairline and wrap a satin scarf on top to create a more seamless look.
The Final Takeaway
Wigs offer immense versatility. They allow us to easily switch up our hair color, cut, and style. However, installing them at home requires patience and practice. From deciding which type of wig you want to figuring out where to apply the glue, there are quite a few steps involved. However, if you follow our experts' advice, you'll be able to install your wig like a pro in no time.


